
Lightroom’s new AI masking tools are a phenomenal addition to any photographer’s workflow. I’ve relied on Lightroom since 2013 and have experienced many tweaks, updates, and improvements, yet these new masking options are some of the best additions to the program I have ever seen. They aren’t just fun extras that look good on a bulleted list of features; instead, the new artificial intelligence (AI) masking tools give photographers an enormous amount of power and flexibility. (I’m already wondering how I went so long without them!)
In this article, I take a careful look at Lightroom’s latest masking updates. I explain what they offer and how to get started!
The power of the mask

Masks are a fundamental element in nearly every editing workflow, and as such, enhancements to Lightroom’s masking process are almost always appreciated. If you create a mask in Lightroom and start making edits, those changes won’t be applied to the original image; they’ll be applied to the area covered by the mask (and the original picture will be completely unchanged). In Lightroom, you can edit any of your masks at any time, and you can even copy masks from one image to another.
While masks in Lightroom give you an incredible degree of flexibility and freedom when editing, they’ve always come with one fundamental issue: they’re tough to make. If you want to edit a portion of an image such as a single object, the sky, or a person’s eyes, you had to manually create a mask that limited your edits to the desired area of the image. Adobe did add several quality-of-life improvements to Lightroom’s toolset over the years that simplified the process of creating highly detailed masks, but until very recently, this process still required a great deal of manual input from the user.

Lightroom’s new AI masking tools solve the problem of creating masks – almost to the point where you don’t even need to do anything when handling many common editing scenarios. While the masks aren’t perfect and require some tweaking from time to time, they do an outstanding job of streamlining the mask-creation process.
Lightroom AI masking tools overview
Before we dive too deep into the new Lightroom AI masking tools, it’s important to understand what they actually do as well as their limitations. The tools are designed to help you in some very specific masking situations: when selecting people, objects, and backgrounds.
Note: The People option is rather comprehensive and automatically creates masks for individual features like eyebrows, lips, teeth, hair, and more. I find that the initial masks do require some tweaking, but if you use Lightroom to process portraits, you’ll be amazed at how much time these auto-masking tools can save you.
But while the Lightroom AI masking tools are both powerful and flexible, they do come with some important constraints. Object selection is generally good but can be frustratingly inaccurate. The same is true for backgrounds, and while I wasn’t forced to go back to the Gradient mask, I did have to tweak AI Background masks more often than I would have liked. The People masks work best when subjects are clear and unobstructed but sometimes fail to identify body parts like arms and legs, and facial-feature masks can be inconsistent.
Even with these small shortcomings, the AI masking tools are very impressive and will likely only improve with time.
The People Mask tool
To use the AI People mask feature, locate an image featuring at least one person. Then select the Masking icon:
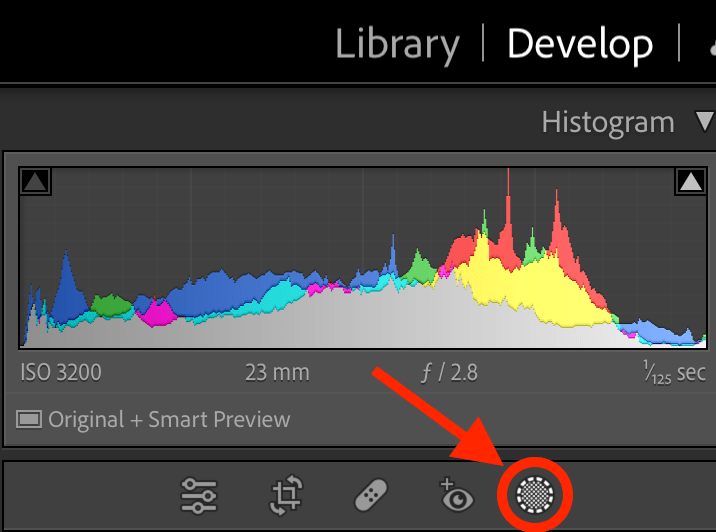
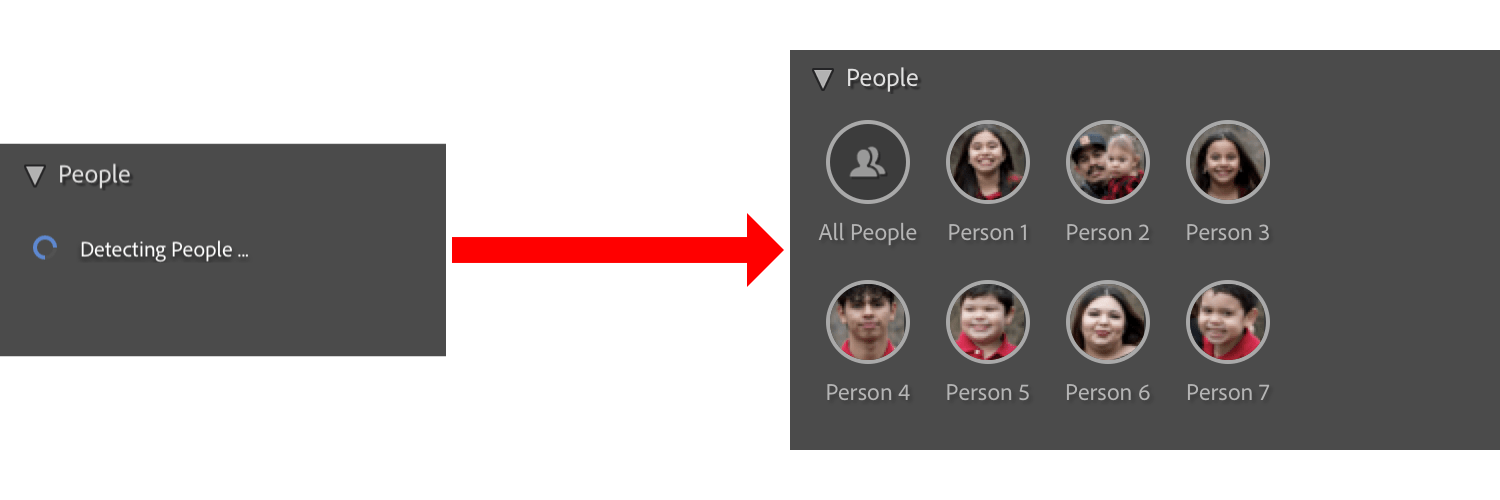
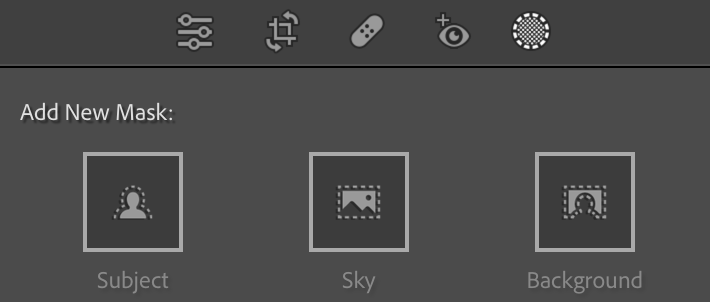
Right away, you’ll see three options for adding a new mask – Subject, Sky, and Background – but don’t click any of them! Lightroom will automatically look for any people present in the picture; you should see “Detecting People” show up below the masking options. Then, after a few seconds, the faces of every detectable person will be visible for you to select:
Hover your cursor over each of the auto-detected people. A red overlay will appear over the corresponding person:
If you want to create a mask so you can edit every person, click All People. If you want to create a mask so you can edit one specific person, just click that person’s face in the menu. You can also create a mask that includes some but not all of the people; start by choosing one person, then click Add People and select additional subjects. If you aren’t happy with the auto-generated masks, you can refine them using the Add and Subtract tools, but I have been pleasantly surprised by the masks Lightroom creates and haven’t usually needed to do much in the way of manual interventions.
After selecting a person, Lightroom will automatically analyze their features and break down the mask into smaller individual components such as eyebrows, lips, and hair. The results you get will vary depending on what the algorithm can detect; you might get lots of options on one person and not as many on another. I don’t find these feature-based masks to be as useful for group shots, but when working with solo portraits, they’re an incredible time-saver.
Portrait powerhouse
The real magic of the Lightroom AI masking tools becomes apparent when working with a large, clear picture of a single person. I used to spend so much time carefully creating masks for teeth, eyes, and skin, but now Lightroom does all that work in a matter of seconds.
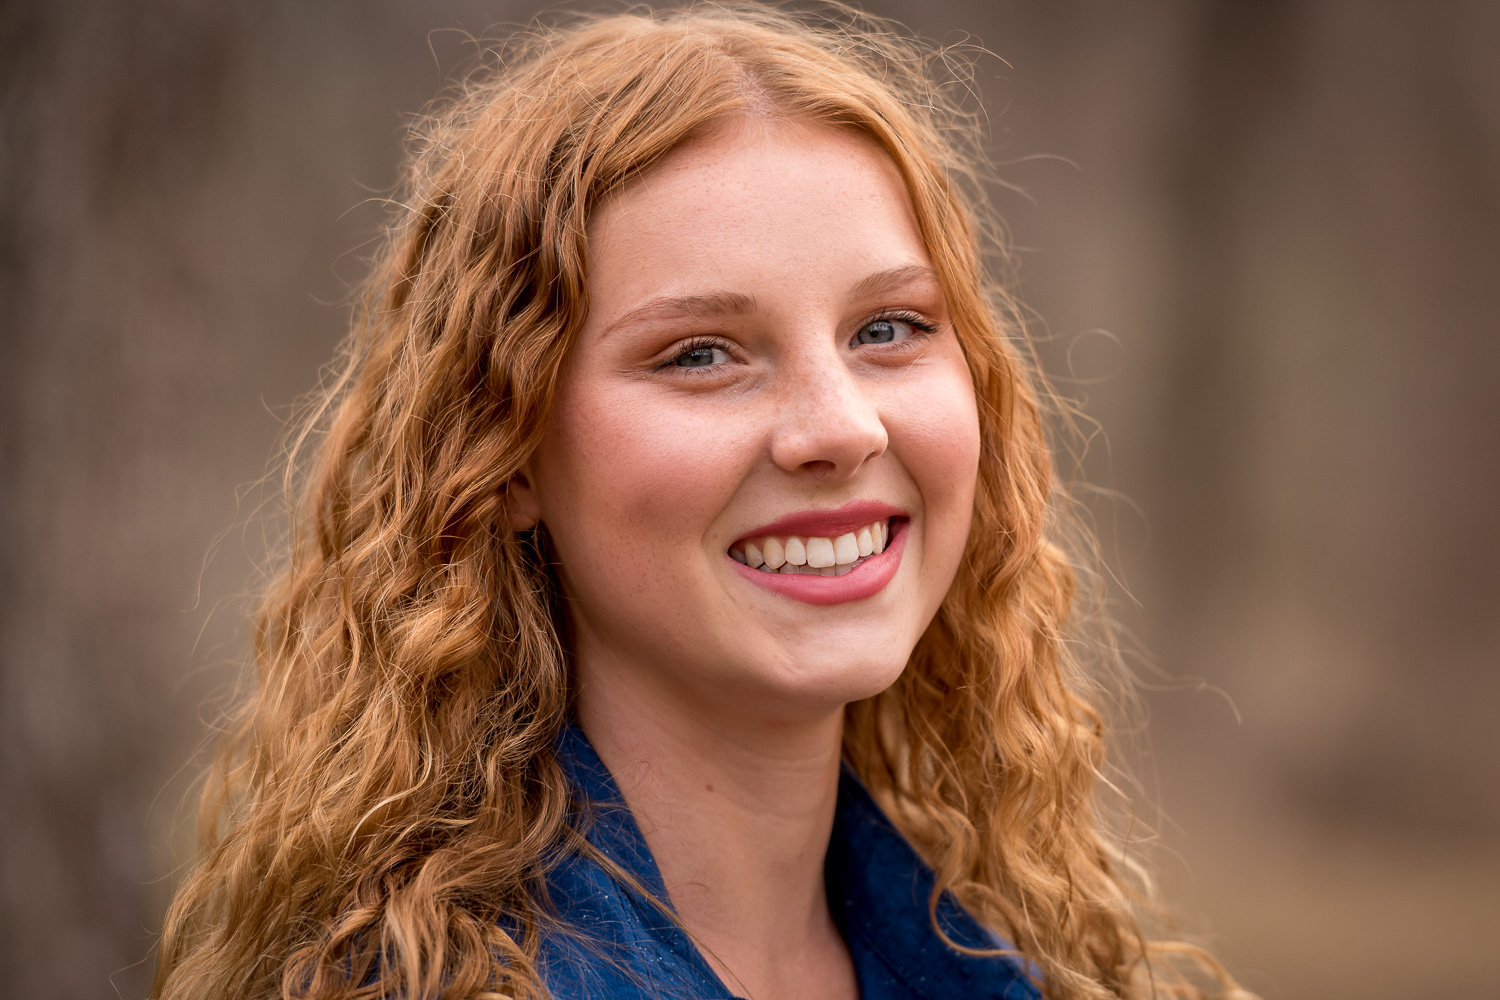
Once the portrait has been analyzed, you can choose a portion of the face to be masked. If you want to generate a mask for more than one part of the image, just click the checkboxes next to the features you want to include. Then click Create Mask and begin your editing.
The AI masking tools work exceptionally well for processes that many portrait photographers use over and over, and you can even use the Copy-Paste or Sync options to use AI masks across multiple images.
Note that the latter operations don’t simply duplicate the mask, but instead duplicate the process used to create the mask. So if you have a particular operation like whitening teeth that you want to apply to dozens of similar portraits, Lightroom will analyze each portrait to find the teeth, then apply the mask on a case-by-case basis. I have used these AI masking tools repeatedly on many different portraits, and as long as you have a clear shot of the subject, the results are very impressive.
The Subject Mask tool
The other AI masking tools aren’t quite as technically impressive as the People Mask tool explored above, but they’re just as useful for photographers who want to streamline their editing process.
The Subject option automatically creates a mask for the subject of your image, while the Sky option is great for nature and landscape photographers who wish to edit only the sky in their images. The Background option is almost the opposite of the Subject Mask: It analyzes your image and creates a mask for what it assumes is the background behind the subject.
As with the People Mask tool, the results aren’t always perfect, but you get a very impressive mask with very little effort.


One important thing to remember about these AI masking tools: They don’t perform editing for you. If you want automated editing options that smooth skin, remove blemishes, adjust smiles, or replace skies with scenic vistas, you’ll need to look elsewhere. These masking tools simply select a specific portion of the image that you can then edit using all the standard options: color temperature, exposure, highlights, shadows, hue, sharpness, and more. And honestly, I’m okay with that.
There are other programs – like Skylum’s Luminar – that use artificial intelligence algorithms to automatically edit your images. Maybe someday Lightroom will incorporate something similar. But for now, Adobe is continuing its long tradition of offering users as many ways to edit an image as possible (without actually performing those edits for you).
The Select Objects tool
In addition to its subject, sky, and background selection tools, Lightroom has one more AI-powered trick up its sleeve: You can create a mask for any object in your picture, even if it’s oddly shaped or not uniform in color. And you can either draw a rectangle around an object or use the Brush tool to help Lightroom understand which object you want to mask.
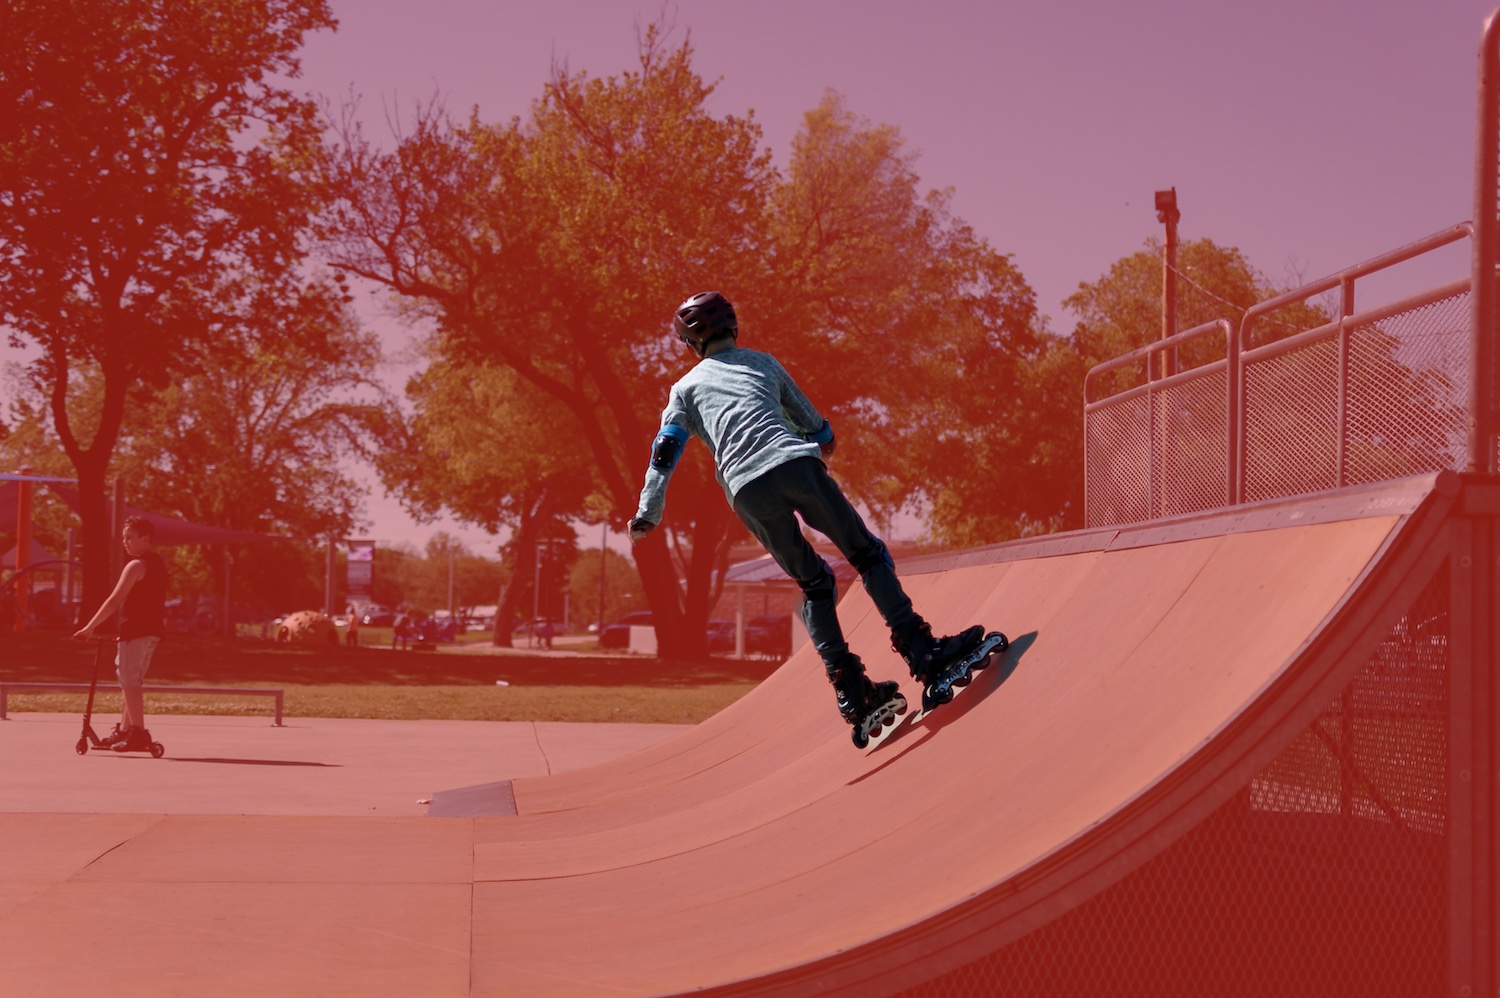
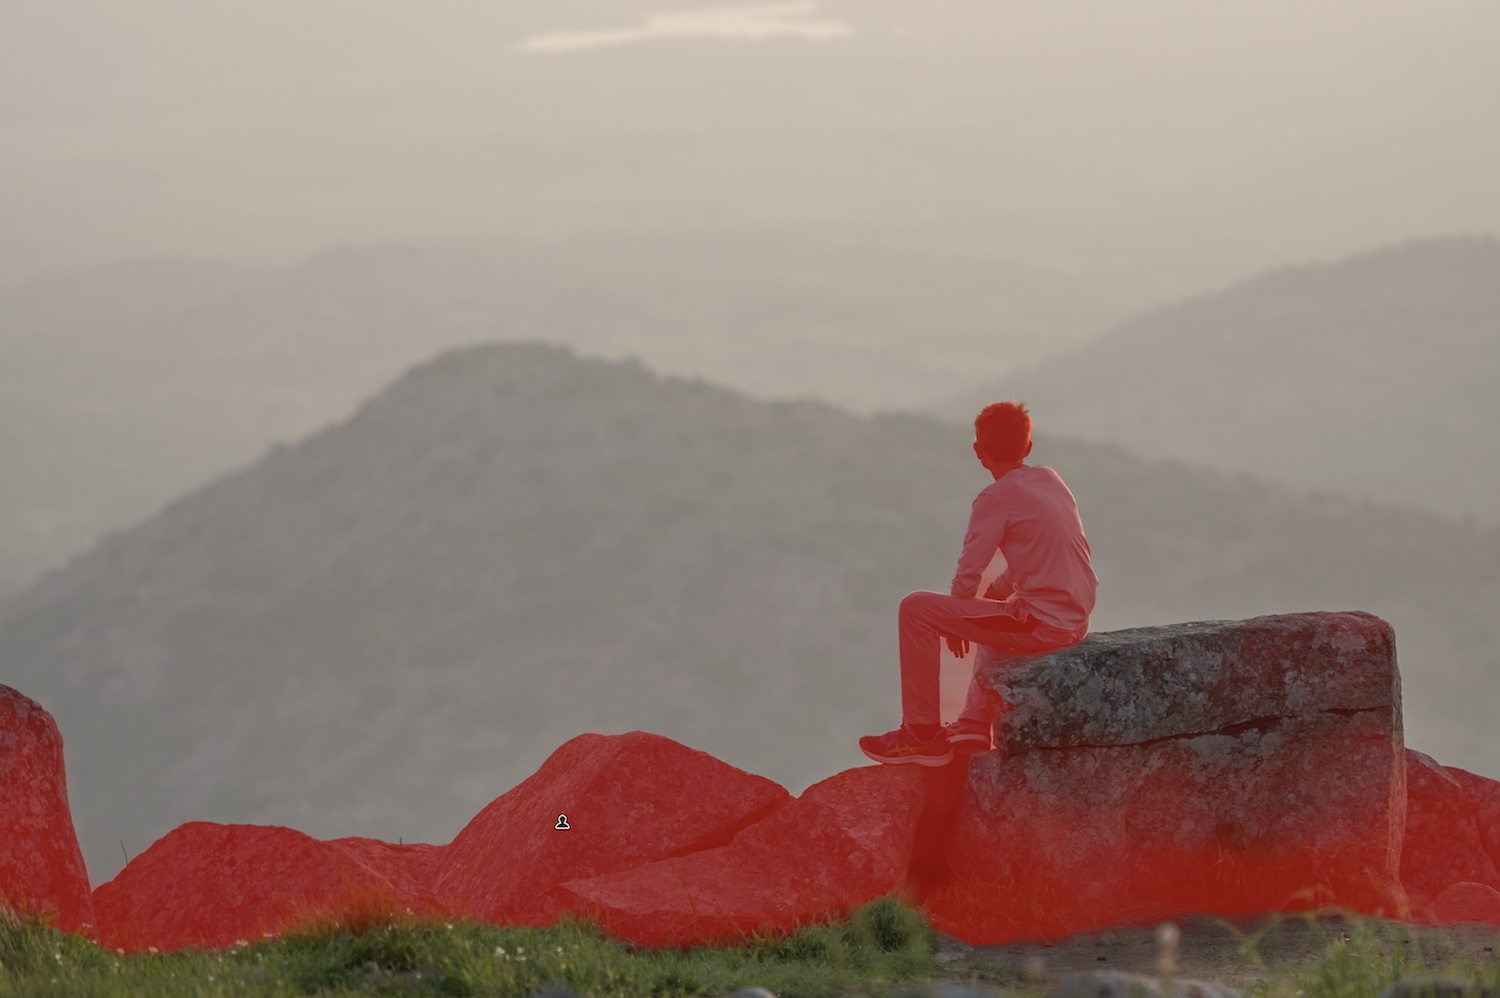
When I was editing the image below, Lightroom’s Select Objects option got a little confused and wasn’t very helpful. I wanted to create a mask that selected just the child, but Lightroom included most (but not all) of the rocks, as well.
Prior to the introduction of Lightroom’s new AI masking tools, I would’ve had to use the Brush tool (with auto-mask) to select only the child. I’ve used that process many times over the years and the results aren’t bad, but it requires a great deal of patience and refinement to get just the right mask.
Thanks to Lightroom’s updates, however, all you have to do is use the Select Object tool and roughly paint over the area where you want the mask to be applied or draw a rectangle around the relevant object.
To mask the child on the rocks, I painted a rough mask with the Brush; in a matter of seconds, I had the mask I wanted.
What makes this process so much easier than Lightroom’s previous masking methods is that you don’t have to be particularly accurate in how you brush in the mask. You can quickly paint over the objects, and Lightroom’s AI algorithms will figure out just where you want the mask to appear. It’s math, not magic, but at times it does feel pretty magical!
Lightroom October update: final words
Lightroom’s new AI Masking tools are the kind of feature I like to see in editing programs. They solve a very real problem for many photographers and can make a dramatic difference to your everyday workflow.
While the results aren’t always perfect, they remove editing roadblocks so you can make more efficient use of your time!
Have you tried the new Lightroom AI Masking tools? Which ones are your favorites, and what tips or tricks do you have to share with others? Leave your thoughts in the comments below.