
I love to do street photography at night. The city is lit with a myriad of interesting and colorful light sources, such as lampposts, neon signs, store windows, car lights, and bare bulbs. People walk around in their favorite outfits. Scenes that seem bland by day turn ominous and fascinating after dark.
But capturing beautiful night street photography can be hard. You have to choose the right settings, contend with camera shake, find the perfect subjects, and more. It’s enough to give anyone a headache!
Fortunately, I’ve been doing street photography at night for many years. And over time, I’ve picked up plenty of tips and tricks that’ll improve anyone’s street night shooting. I’ve tested different settings, I’ve determined how to handle nighttime lighting, and I’ve learned how to stay safe.
So to discover my top street night photography tips – and to learn how to capture gorgeous images even in the darkness – read on!
1. Use the best camera settings to keep your subjects sharp
To freeze motion during the day, I prefer to use a shutter speed of 1/320s (with 1/160s as my lower threshold).
But at night, this changes. In the brightest areas – lit by streetlights or car headlights – you can comfortably photograph at 1/250s, but most of the time, you’ll need to use a shutter speed between 1/160s and 1/60s. Otherwise, you’ll be forced to boost your ISO to ridiculous heights, and you’ll risk ruining your images with noise.
When your shutter speed is set to 1/60s, you’ll need steady hands and a wide-angle focal length. (A lens or camera with image stabilization can help, too!) In fact, to photograph handheld at 1/60s, you need to stop your own motion completely. Fortunately, with some practice, this can be done.
Why do you need a wide-angle lens? The longer the focal length, the higher the image magnification and the greater the likelihood of camera shake. If you’re working with a 200mm lens, it’s ridiculously hard to shoot at 1/60s and come away with consistently sharp images. Switch to a 28mm or 35mm lens, however, and it’ll be far easier!
It also helps to use a fast prime lens, such as a 35mm f/2 – because the wider the aperture, the faster you can make your shutter speed (or the lower you can drop your ISO). It’s possible to shoot at f/4 in brighter areas, but if you can shoot at f/2.8, f/2, or even f/1.8 as needed, you’ll have a much easier time.
Finally, you’ll need to raise your ISO to 1600, 3200, or even 6400. With modern digital cameras, you can photograph at high ISOs and come away with decent images, and while it’s always best to keep the ISO as low as possible, you just won’t manage to get well-exposed shots at night otherwise. (I personally shoot at ISO 3200, and I sometimes go to ISO 6400 in especially dark areas or when I’m photographing fast-moving subjects.)
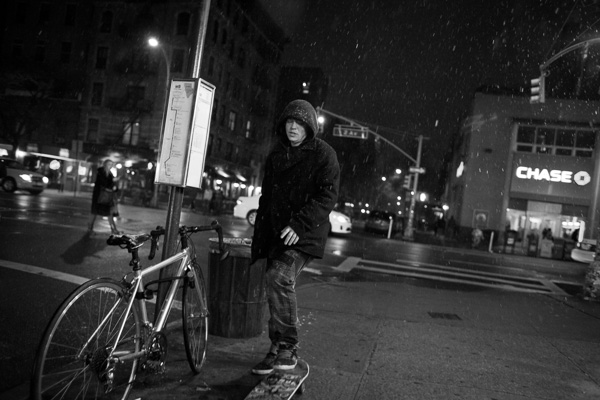
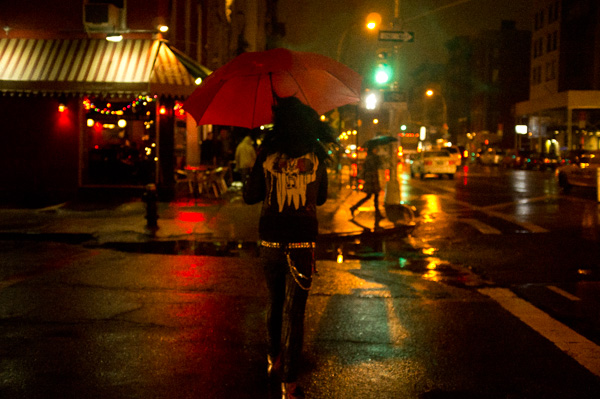
2. Seek out light sources
Always pay attention to the main light sources in a scene. This is true no matter where or when you are photographing, but it becomes even more important at night. So instead of hunting for subjects, start by finding a beautiful light source or an area with good lighting, then wait around for something to happen.
Note that night street photography lighting can be anything: car headlights, streetlights, neon signs, window lighting, or even smartphone light. Simply look for noticeable illumination, then pay careful attention to how these light sources hit potential subjects. Adjust your angle until you get the lighting effect you want, then shoot away!
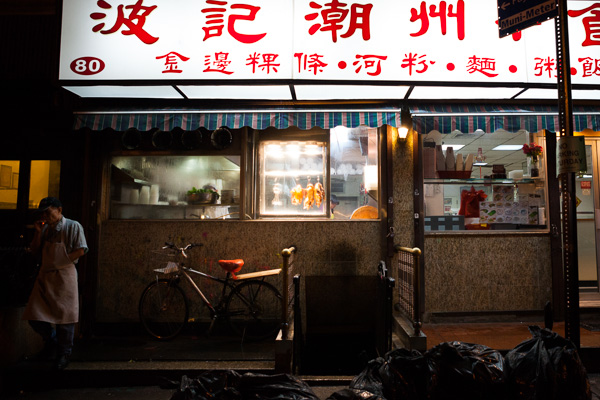
When I was photographing the streets of New York City, I found a beautiful restaurant with bright windows. I used the restaurant lighting to bring out detail in the passersby:
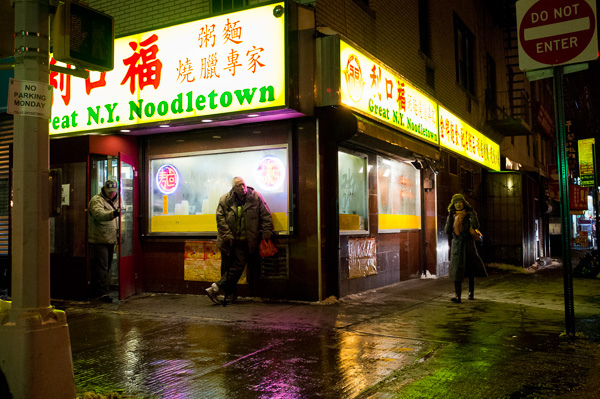
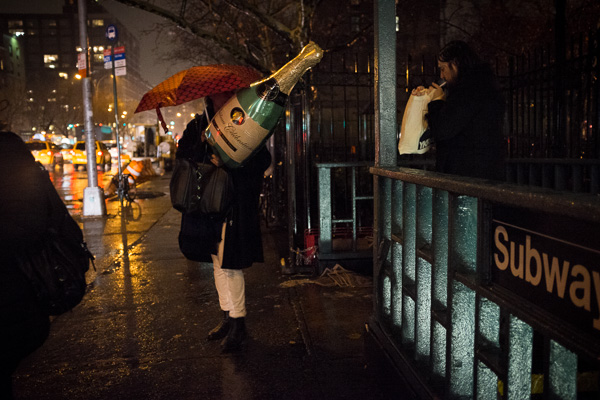
3. Photograph nightlife
Certain parts of the city – such as the business district – can empty out at night; they’ll make for a poor night street photography experience. Other areas, however, will get busier after sunset, and they’ll offer plenty of opportunities.
So seek out the nightlife and shoot it! You might consider doing some internet searches for bars and clubs in your area, then make sure you head on over as the night begins. Alternatively, if you’re after more formal-looking subjects, go for a walk near some upscale restaurants and see what you can find!
And don’t feel like you’re restricted to photographing people on the street outside clubs and restaurants. You can capture all sorts of stunning effects by shooting through windows (plus, if you’re feeling a bit nervous about photographing people, the window can act as a barrier and reduce your anxiety).
4. Alternate between getting close and stepping back
I’m a big proponent of Robert Capa’s advice that “if your photos aren’t good enough, you’re not close enough.” However, I often violate this rule at night.
You see, while I do try to get close to many of my subjects – and I encourage you to do the same – I also try to create compositions where the subjects are small aspects of the overall scene. At night, backgrounds can be much more beautiful than during the day, so it often pays to have people become the secondary element in the scene, rather than the primary focus.
This approach comes with a technical advantage: When your subjects are off in the distance, you won’t need to use a fast shutter speed to capture their motion. A nearby subject can be frozen at 1/125s or faster; a distant subject can often be photographed at 1/60s and turn out sharp, even if it’s on the move.
5. Experiment with a tripod for creative effects
When doing street night photography, it’s usually best to go handheld. After all, you never know what interesting things are about to happen, and you want to be able to react fast.
That said, it can be useful to bring along a tripod, especially if you’re interested in capturing some long-exposure street photography.
The idea here is to find a busy area, mount your camera on a tripod, then use a slow shutter speed to capture people in motion. You’ll need to experiment with different shutter speeds (1/8s is a good starting point), and you’ll need to shoot a lot of photos, but you’ll eventually end up with some gorgeous motion blur effects:
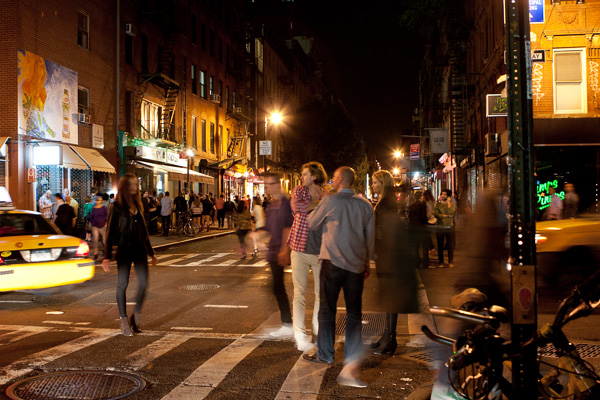
It took me a long time to capture the image displayed above; I wanted the people spread throughout the entire scene, and I also wanted an interesting foreground subject (in the end, I was satisfied by the pose of the woman in the street and the man looking at her).
6. Try working with a flash
Some street photographers love using a flash, while others hate it. Whether you decide to try flash at night is up to you; on the one hand, it’ll provide extra illumination so you can use a faster shutter speed, a narrower aperture, and a lower ISO. On the other hand, it’ll give a very intense deer-in-the-headlights look, plus it can lead to confrontation (people don’t like being flashed, especially in the dark!).
Personally, I prefer to work with the constraints of natural light, and I also get uncomfortable flashing strangers in dark settings. But if you feel confident enough to shoot with flash, then by all means, try it and see what you think. It can give a fantastic look when done well.
Note that you can have the flash do all the work lighting the scene (so that the foreground area turns out lit and the background is completely dark). But you can also set your camera to slightly underexpose the scene, then use the flash to add some fill light to your main subjects in the foreground.
7. Be careful when boosting the exposure

When photographing with a high ISO, it’s important to nail the exposure; that way, you’re not forced to increase the brightness when editing, which will exaggerate unpleasant noise effects.
That being said, you’ll occasionally run into situations where you accidentally underexpose a shot. And when this happens, you’ll have no choice but to raise the exposure when editing. Just make sure you do it carefully.
Here’s my recommendation: First, ignore the noise and get the exposure and look correct. If you have to raise the exposure a significant amount, the noise will be terrible, so you’ll need to apply some noise reduction.
There are many excellent noise reduction programs, but I like Lightroom’s built-in noise reduction. If the noise is still bad after applying the noise reduction algorithm, try bringing the image into Photoshop to add a very slight Gaussian blur.
At that point, I often use Lightroom’s grain settings to add texture back into the photo. The result looks much more pleasing to the eye than extreme digital noise, and it can hide some of the technical deficiencies of underexposed images. The photo will not look perfectly sharp, but it can still be beautiful.
8. Don’t be afraid of blur and imperfection
Most street photographers aim to get their photos as sharp as possible. Sharpness certainly isn’t a bad thing – but know that a photo can still look fantastic even if it isn’t incredibly crisp.
You see, when photographing at night, you don’t need to freeze motion perfectly to get a stunning result. Personally, I hold my day images to a higher standard than my night images. My day images need to look sharp, while my night photos simply need to be interesting and look good, even if they’re a little blurry in places.
Also, at shutter speeds from around 1/60s to 1/30s, it can be fun to shoot handheld. Your subjects will turn out somewhat sharp, yet there will be a little motion, too. It’s a great way to add a sense of energy to your compositions.
9. Let your night street photos look dark
In my view, night shots should look like they were taken at night. They should be dark, with deep shadows and areas that are hard to see. When you look at the histogram of a night image, it should be skewed toward the far left, especially relative to your day images.
But when you point your camera toward a street scene at night, it’ll often overexpose the photo. The resulting file will look bright and you’ll be able to see plenty of detail, but the scene just won’t feel real. (You’ll also end up with blown-out streetlights and store windows.) In such cases, you’ll want to lower the exposure compensation on your camera slightly or – if you’re shooting in Manual mode – boost the shutter speed, narrow the aperture, or widen the ISO.
I do think that bright night images can look good. But dark, realistic night images are generally better, so carefully monitor the histogram and don’t be afraid to drop that exposure compensation as needed.
10. Be careful
Depending on where you live, heading out at night with a camera is not always the safest idea. Travel light, keep your equipment to a minimum, and be careful about where you go. Make sure you pay attention to your surroundings, and if you start to feel uncomfortable, head in the other direction.
If you’re not sure whether you can safely photograph on the streets at night, do some research. I’d recommend messaging veteran street shooters in the area, though you can also look at general articles and statistics covering city crime rates.
Use your best judgment regarding who to photograph, and think about bringing a friend along. Don’t stay in one place for too long, and avoid putting down your gear to change lenses. Finally, if you desire greater peace of mind, insure your gear before you head out!
Tips for night street photography: final words
Well, there you have it:
My top tips for stunning night street shots.
Getting beautiful street photos at night isn’t always easy. But if you remember these tips and you practice frequently, you’re bound to get some great images!
Do you have any street night photography tips you’d like to add? Which tip do you plan to follow first? Share your thoughts in the comments below!
Table of contents
Street Photography
- GENERAL
- PREPARATION
- SETTINGS
- LIGHTING
- COMPOSITION
- GEAR
- ADVANCED GUIDES
- In the Dark: 10 Tips for Street Night Photography
- 1. Use the best camera settings to keep your subjects sharp
- 2. Seek out light sources
- 3. Photograph nightlife
- 4. Alternate between getting close and stepping back
- 5. Experiment with a tripod for creative effects
- 6. Try working with a flash
- 7. Be careful when boosting the exposure
- 8. Don’t be afraid of blur and imperfection
- 9. Let your night street photos look dark
- 10. Be careful
- Tips for night street photography: final words
- CREATIVE TECHNIQUES
- POST-PROCESSING
- BUSINESS
- INSPIRATION
- OPINION

